Chip welding occurs when chips (or swarf) produced during the cutting process adhere to a cutting tool—such as a bandsaw blade—due to high heat and pressure at the cutting zone. This issue is particularly common with softer, more ductile materials or materials with properties that allow deformation and sticking during cutting. Chip welding can negatively impact cutting efficiency, damage blades, and reduce the overall quality of the cut.
By understanding the causes of chip welding and applying targeted solutions, operators can minimize its occurrence and maintain optimal cutting performance. Below, we examine the most common causes of chip welding and present practical solutions for each one.
1. High Cutting Speed
Excessive cutting speeds generate excessive heat in the cutting zone, increasing the likelihood of chips adhering to the blade due to metal-to-metal contact.
Solution: Reduce the cutting speed to an optimal level based on the material and blade type. Most materials have specific speed parameters that balance efficiency and heat mitigation. Avoid running at speeds that generate unnecessary temperature buildup.
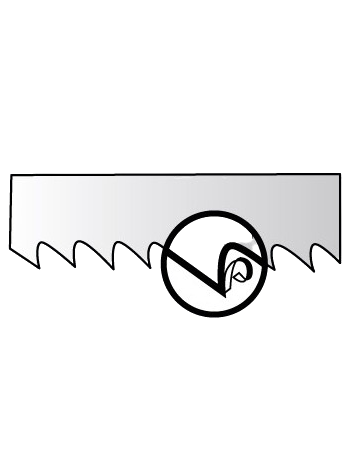
2. Excessive Feed Rate
A high feed rate increases friction between the blade and the material, creating additional heat and pressure that promote chip welding.
Solution: Lower the feed rate to reduce friction and allow the blade to cut more cleanly. A slower and controlled feed also ensures that the chips are properly removed, minimizing their tendency to stick.
3. Insufficient Coolant or Lubrication
Coolants and lubricants play a critical role in dissipating heat and reducing friction during cutting. Without sufficient coolant, the cutting temperature rises, increasing the risk of chip welding.
Solution: Apply an appropriate amount of coolant or lubricant to the cutting zone. Ensure that the coolant system is functioning correctly and that the right type of cooling agent is used for the material and blade.
4. Dull or Damaged Blade
Worn or dull blades struggle to cut materials efficiently, generating excessive friction, heat, and improper cutting forces. This leads to greater surface stickiness, promoting chip adhesion.
Solution: Regularly inspect the blade for wear and dullness. Sharpen or replace blades as needed to maintain efficient cutting performance and minimize heat buildup.
5. Incorrect Blade Type
Using a blade unsuitable for the material being cut—whether due to incorrect tooth configuration, blade material, or pitch design—can hinder cutting efficiency, generate excessive heat, and promote chip welding.
Solution: Select the correct blade type specifically designed for the material and cutting application. Factors such as tooth angle, gullet design, and blade material should match the material’s properties (e.g., hardness, ductility, etc.).
6. Material Properties
Materials with ductile or soft properties (e.g., aluminum, copper, soft steels) are more prone to chip welding. Their tendency to deform rather than fracture during cutting allows chips to stick more readily to the blade.
Solution: Adjust cutting parameters, including speed, feed rate, and coolant flow, to account for difficult materials. When possible, consider using harder or less ductile materials to minimize chip welding issues.
In this case, using lubricant instead of coolant can be particularly important. Certain materials must be cut with lubricant, especially at high speeds.
7. Workpiece Imperfections
Cracks, hard spots, or other inconsistencies in the workpiece can create unstable cutting conditions, which result in localized heating and chip welding.
Solution: Inspect workpieces thoroughly before beginning any cuts. Remove defects or irregularities when possible to ensure uniform cutting conditions.
8. Improper Workpiece Clamping
If the workpiece is not securely clamped, any movement or vibration during cutting can create uneven forces and localized heating. This increases the likelihood of welding chips to the blade.
Solution: Ensure that the workpiece is securely clamped. Double-check the setup to minimize any movement or vibrations during the cutting process.
Troubleshooting Steps for Chip Welding
When chip welding occurs, the following systematic steps can help identify and resolve the issue:
- Reduce Cutting Speed: Adjust cutting speeds to optimal levels, balancing efficiency and heat management.
- Lower the Feed Rate: Decrease feed rates to reduce friction and heat buildup.
- Increase Coolant/Lubricant: Apply coolants or lubricants to mitigate heat and facilitate smooth cutting.
- Inspect and Sharpen the Blade: Check for dullness or wear and replace or sharpen the blade as needed.
- Verify Blade Type and Configuration: Ensure the blade’s tooth pattern, material, and size are suitable for the workpiece material.
- Inspect Workpieces for Defects: Check for cracks, hard spots, or other imperfections, and address them before cutting.
- Check Clamping: Confirm that the workpiece is properly secured and that vibrations are minimized.
Conclusion
Chip welding is often caused by a combination of factors, including improper operating parameters, inadequate blade maintenance, unsuitable material choices, and poor handling of the workpiece. By systematically troubleshooting key areas—such as blade selection, cutting speed, feed rate, and cooling—operators can significantly reduce chip welding and enhance cutting efficiency and accuracy. Regular maintenance, inspection of blades and materials, and proper setup practices are essential for preventing chip welding and preserving the longevity of bandsaw blades and machines.